Preparing woodwork before filling
The filling should be carried out once the surfaces have been suitably prepared and primed and allowed to dry. You’ll be surprised how the primer will show up defects which need to be filled.
Mixing the filler
Mix filler into an easily workable paste – not sloppy. Using an old cup or similar container is far easier than mixing on a flat surface. Pour in some powder and add water whilst stirring to create a smooth paste. To save yourself a lot of sanding-down and time, follow the technique below rather than the common one of over-filling to allow for shrinkage, and sanding back smooth.
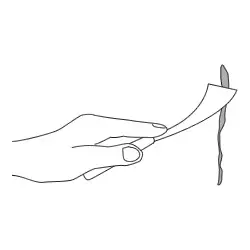
Using flexible filler or caulk
When filling cracks at internal angles or at the junction between skirtings/frames and walls, use flexible filler. This will allow for a little movement. It is applied using a mastic gun. You don’t have to be terribly neat as it is water-soluble before it dries and can be simply smoothed using a wet finger or sponge.
Technique for filling
Put some filler on a board or other flat object.
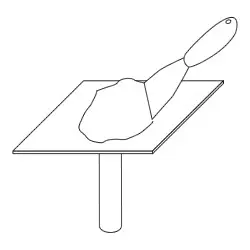
Take up some of the filler across the end of your filling knife and scrape this down over the defect. With a little practice, you’ll find you can fill the hole or crack in one sweep of the knife leaving it fairly smooth and flush. The movement is similar to the way they remove the surplus fat from a flat griddle in a burger bar.
Allow the filler to dry. All but the smallest repairs will shrink slightly below the surface.
Now repeat the operation in exactly the same way as before. This will take up the shrinkage and leave an almost ready to decorate the surface.
Sanding the filler smooth
Use a sanding block lightly to sand the surface flush.
Wear a mask when sanding to prevent the inhalation of the dust.
Applying this second layer of filler is a lot easier and creates far less dust than the rubbing down of over-filled holes.
Don’t attempt to fill larger holes in one go. Build up the filler in manageable layers which stay put and don’t sag. Allow each layer to dry before adding the next.
The grain of the wood can be filled using grain filler.